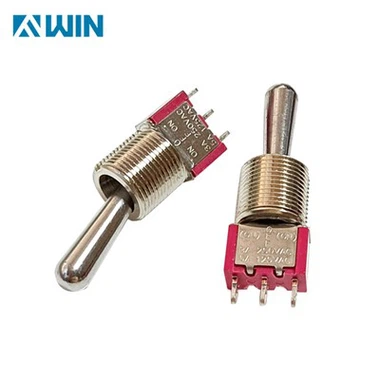
Metal Button Switch Product Installation Instructions And Precautions
Dec 19, 2024
Installing a metal button switch correctly is crucial for ensuring its long-term reliability and functionality, particularly given its use in demanding environments. Proper installation helps to avoid potential issues such as switch failure, safety hazards, or improper functionality. Below are detailed installation instructions and precautions to follow when installing a metal button switch in your system.

Installation Instructions
1. Preparation and Tools
Before beginning the installation process, ensure you have the necessary tools and components:
Metal Pushbutton Switch
Screwdriver or Drill
Soldering Iron (for wired connections)
Solder (for connecting leads)
Wires (appropriate gauge for your application)
Mounting Panel or Enclosure
Electrical Tape or Shrink Tubing (if necessary)
Ensure the power to the system is completely off to avoid electrical shocks or damage.
2. Choosing the Mounting Location
Location and Accessibility: Choose a location on the panel or device that is easily accessible to the user and appropriate for the intended use. Ensure the location is within reach for normal operation but is also protected from accidental presses in some applications (e.g., military or industrial control).
Panel Hole Size: Verify the diameter of the panel hole where the switch will be mounted. Metal pushbutton switches typically come with standardized sizes (e.g., 16mm, 19mm, etc.). The hole must be drilled or prepared according to the specific size of the switch body to allow for a secure fit.
3. Mounting the Switch
Insert the Switch into the Panel Hole: Gently insert the metal pushbutton switch into the pre-drilled hole of the panel. Most metal pushbuttons have a threaded body or nut, which allows for secure fastening.
Secure the Switch: If the switch has a threaded body, thread the nut onto the switch from the rear of the panel. Tighten it by hand or with a wrench, ensuring it is secure but not overtightened, which could damage the switch or panel.
Ensure Proper Alignment: Align the switch in a way that ensures the button will be in the correct orientation and operates smoothly.
4. Wiring the Switch
Identify the Terminals: Most metal pushbutton switches have clearly marked terminals for wiring. Common terminal types include Normally Open (NO), Normally Closed (NC), and Common (COM).
For Momentary Switches: The switch will typically have three terminals. The Common (COM) terminal connects to the power source, while the NO terminal connects to the circuit to be activated.
For Latching Switches: The switch may have two or more terminals for toggling between on and off states. Consult the datasheet for the specific terminal functions.
Soldering the Wires:
Cut the wires to length based on where you plan to connect the switch. Use an appropriate gauge wire (usually 18 AWG or 20 AWG for typical metal pushbuttons).
Strip the insulation from the ends of the wires using a wire stripper.
Solder the wires to the correct terminals on the switch. Apply soldering iron to the terminal for a few seconds and feed in the solder. Once the solder has cooled, ensure the connection is solid by gently tugging on the wire.
Double-Check the Wiring: Ensure that the wiring is correct according to the switch's wiring diagram. Miswiring can lead to malfunction or electrical hazards.
5. Testing the Installation
Check for Correct Functioning: Once the switch is mounted and wired, power on the system. Press the button to verify that it performs its intended function. For momentary switches, the circuit should activate only while the button is pressed. For latching switches, ensure it toggles between on and off states correctly.
Visual Inspection: Inspect the switch and wiring for any signs of loose connections, visible damage, or poor soldering.
Precautions for Installation
1. Electrical Safety
Power Off: Always ensure that the power is disconnected before beginning installation. This minimizes the risk of electric shock and protects the circuit from accidental shorts.
Correct Voltage and Current Ratings: Check that the metal pushbutton switch is rated for the voltage and current of the circuit you're connecting it to. Exceeding the switch's rating can cause failure or damage.
2. Proper Grounding
Grounding: Ensure that the switch is properly grounded if necessary, especially if it is a metal switch in a high-voltage system. A proper ground prevents electrical shocks or interference with other electronic components.
3. Avoiding Over-Tightening
Do Not Over-Tighten the Nut: Tightening the mounting nut too much can damage the switch housing or affect its function. Tighten it firmly, but ensure not to overtighten.
4. Sealing and Environmental Protection
Waterproofing/Sealing: If your installation is in a wet or dusty environment, make sure that the switch has an appropriate IP rating (e.g., IP67, IP68) and that any necessary sealing (e.g., rubber gaskets) is in place. Improper sealing can cause contamination and failure of the switch mechanism.
5. Proper Alignment
Button Orientation: Ensure the switch is properly aligned in the panel for both aesthetic purposes and functionality. Misalignment can cause the button to become jammed or difficult to operate.
6. Avoid Physical Damage
Handle with Care: Metal pushbutton switches are durable, but excessive force can damage the switch. Handle the switch carefully to avoid damaging the button or contacts during installation.
Vibration Considerations: In industrial environments, where vibration is common, ensure the switch is securely mounted and that connections are tight to avoid contact failure over time.
7. Preventing Corrosion
Corrosion-Resistant Materials: For switches exposed to harsh or corrosive environments, ensure the switch material (such as stainless steel or anodized aluminum) is suitable for the conditions. If the switch is exposed to chemicals, consider using corrosion-resistant coatings.
8. Testing Under Load
Function Test: After installation, always perform a thorough test with the system under load to ensure the switch functions correctly. Check for issues such as delayed response or failure to toggle on/off as expected.
Proper installation of a metal button switch is essential for ensuring its reliable and safe operation. By following these installation instructions and taking necessary precautions, you can avoid common installation errors and ensure the longevity and functionality of the switch in your system. Always remember to handle electrical components safely, verify wiring, and check the installation carefully before powering up the system.