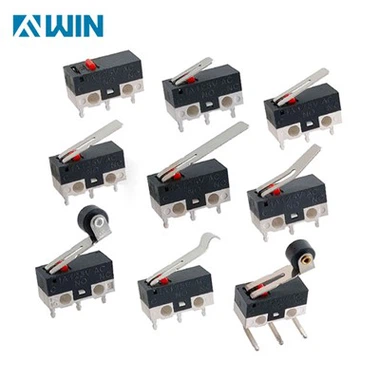
What's the best way to assemble a metal button switch?
Jan 06, 2025
Assembling a metal button switch involves a few important steps to ensure proper functionality, durability, and safety. Metal button switches are commonly used in various applications, including electronic devices, appliances, and musical instruments like synthesizers. These switches are popular for their sleek appearance, tactile feedback, and long-lasting performance. The assembly process may vary depending on the specific type of switch (e.g., momentary or latching), but the following general steps can guide you through the assembly process.

1. Understand the Switch Specifications
Before starting the assembly, it's essential to understand the specifications of the metal button switch. Key specifications to consider include:
Type: Momentary (push to make) or latching (push to toggle).
Voltage and Current Ratings: Ensure the switch can handle the voltage and current your circuit will require.
Mounting Type: Panel mount, PCB mount, or surface mount.
Material: Typically, the body of metal button switches is made from stainless steel or anodized aluminum, both of which are highly durable.
Size: Confirm the size of the switch relative to the mounting hole or PCB design.
Illumination: Some metal button switches feature built-in LEDs for visual feedback when activated.
Understanding these specifications will help you choose the correct components and tools, and ensure that the switch operates safely within the limits of your design.
2. Prepare the Tools and Components
The assembly of a metal button switch requires a few essential tools and components:
Soldering iron and solder: For making electrical connections (if PCB mount or wire connections are required).
Screwdrivers or wrenches: For securing the switch in place.
Wire cutters and strippers: To prepare the wires that will connect to the switch.
Multimeter: For testing the assembly and ensuring proper connections.
Panel or PCB (if applicable): The mounting surface for the switch.
Heat shrink tubing or electrical tape: For insulating connections.
Mounting hardware: Screws or nuts for securing the switch in place.
Once you have gathered these components, you can begin the assembly process.
3. Prepare the Mounting Surface
Whether you're mounting the switch onto a panel or a PCB, preparation is crucial for a clean and secure installation.
Panel Mounting
For panel-mounted switches:
Prepare the mounting hole: Use a drill with the correct diameter bit to create a hole in the panel that matches the size of the switch. Make sure the hole is smooth and properly aligned for easy insertion of the switch.
Clean the surface: Ensure that the area around the hole is clean and free of debris to avoid any interference during the installation.
Insert the switch: Slide the metal button switch into the hole. If the switch has threaded terminals, position it so the threaded portion of the switch protrudes through the panel.
PCB Mounting
For PCB-mounted switches:
Align the switch: Insert the metal button switch through the appropriate holes in the PCB, ensuring that the leads line up with the correct pads.
Check for clearance: Ensure that there is enough space around the switch to prevent any components from interfering with its operation or the movement of the switch.
4. Soldering the Connections (if applicable)
If the switch requires electrical connections (such as a PCB-mounted version), you will need to solder the leads or terminals to the circuit.
Tin the leads: Before attaching the wires or leads, apply a small amount of solder to the tips of the leads. This is called "tinning," and it will help the solder flow more easily during the soldering process.
Prepare the wires: Strip the ends of the wires that will connect to the switch. Ensure that the exposed wire is clean and free of fraying.
Solder the leads to the PCB or terminals: Heat the soldering iron and carefully apply it to the solder pad on the PCB and the lead of the switch. Feed a small amount of solder into the joint to create a secure connection. Be sure not to use too much solder, as excess can cause short circuits.
Inspect the solder joints: After soldering, check that the joints are smooth, shiny, and free of bridges (unintended solder connections between adjacent pads). Use a multimeter to check for continuity and confirm that the switch is correctly wired into the circuit.
5. Securing the Switch in Place
Once the switch is correctly mounted and the electrical connections are made, the next step is to secure the switch in place.
Panel Mount
Tighten the nut: If the switch is designed for panel mounting, a nut is usually provided that you can use to tighten and secure the switch to the panel. Use a wrench or screwdriver to ensure the switch is tightly fitted but not over-tightened, which could damage the threads.
Check for stability: Gently test the switch by pressing it to make sure it doesn't move or wiggle. A firm fit will prevent any mechanical issues over time.
PCB Mount
Secure the switch with screws (if needed): Some PCB-mounted metal button switches may have mounting screws that need to be tightened to ensure a secure connection.
Ensure proper alignment: Double-check the alignment of the switch on the PCB to ensure it's correctly positioned for activation and that no pins or leads are bent or damaged.
6. Testing the Assembly
Once the metal button switch is assembled, it's important to test it to make sure everything is functioning as expected.
Check continuity: Use a multimeter to check that the switch is properly closing or opening the circuit when pressed, depending on whether it's a momentary or latching switch.
Test the function in the circuit: If the switch is part of a larger system, power on the circuit and verify that the switch performs its intended function, whether that's powering a device on/off, changing modes, or activating a signal path.
Check the button action: Press the metal button switch several times to ensure that it provides consistent tactile feedback and operates smoothly. This is important for user experience, especially in applications where frequent interaction is required.
7. Final Adjustments and Insulation
If necessary, use heat shrink tubing or electrical tape to insulate exposed wires or solder joints. This will help protect the connections from short circuits and ensure safety in the final assembly.
Conclusion
Assembling a metal button switch involves several key steps: selecting the right switch for the job, preparing the mounting surface, making secure electrical connections, and testing the final setup. By following these steps carefully, you ensure that the switch functions reliably, provides clear tactile feedback, and maintains durability in the long run. Whether you're assembling a metal button switch for a synthesizer, a control panel, or an industrial application, taking the time to follow proper assembly procedures will result in a high-quality, dependable switch for your project.